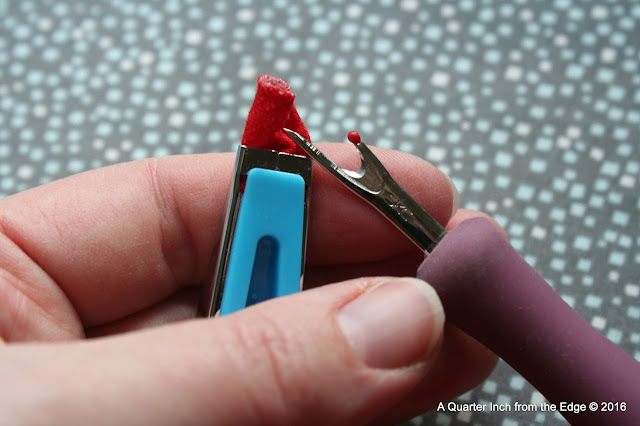
Time to stop procrastinating and get to it. My repair plan involves the creation of bias tape to cover questionable raw edge appliqué. I thought I'd share with you my step by step directions for creating bias tape.

1. Iron your chosen fabric and lay it out on your cutting mat. Using the 45 degree line and a large ruler, make your initial bias cut. Lament the fact that your lovely yardage is going to be a weird shape when you put it back in your stash.
2. Re-position your fabric with the diagonal cut against the vertical lines. Spend valuable quilting time Googling what size strips to cut for your size of bias tape maker. Or read the (likely misplaced) instructions for your chosen bias tape maker. Your call. Overestimate the number of tiny, stretchy bias strips required and get to cutting.
3. Sew your tiny, stretchy strips together whilst hoping against hope that your machine doesn't choose this moment to chew up the edges when you start a segment seam and jam them clear into the bobbin case while creating a colossal thread nest.
4. Trim to ¼ inch seam allowance and press open. Attempt to avoid steam burns while cursing the concept of pressing seams open.
5. Stuff the end of your strip into the bias tape maker. Curse. Think about why you chose not to starch your fabric.
6. Using whatever sharp object is at hand, stuff/tease/drag your strip into the bias tape maker.
7. Stuff/tease/drag the end of your strip out of of the bias tape maker. Wonder why your fingers are so large and/or why the bias tape maker is so small.
8. Enjoy the zen magic of bias tape creation. Press, slide, press, slide. Ohmmm. Wonder why you don't do this on EVERY project you ever make.
9. Stare in disbelief and consider why this occurred. Curse the bias tape making Gods/Goddesses. Press wonky edges down whilst incurring steam burns on fingertips. Think about turning off steam function.
10. Hold your breath whenever one of the carefully pressed open seams from Step 4 passes through the bias tape maker. Pray to the bias tape making Gods/Goddesses.
11. Argue with your bias tape maker over which side of the fabric you REALLY wanted on the outside of your bias tape. Exert your will and twist strip until it flips right side out again. Press. Burn fingers. Curse.
11. Repeat Steps 8, 9, and 10 at random intervals.
12. Breathe a sigh of relief as you come to the end of the strip without further incident.
12. Sew it to something.
Though there might be a couple extra steps in my tutorial, it might be useful to someone out there. I'm linking it up with Tips & Tutorials Tuesdays @ Late Night Quilter.
J
P.S. If you're looking for a resource that's a little more concise, check out this PDF from Dritz.
P.P.S I forgot to announce that Ana @ Mad Cat Quilts won the giveaway from last week's Stash Love link-up! A custom scrap pack of oranges and yellows will be heading her way soon!


I'm glad you got there in the end. I love the honesty. I believe I would follow this tutorial exactly were I ever to try.
ReplyDeleteYes, yes.... you and me both. and Thanks to Jenn, I would be laughing the entire time!!!
DeleteLove it!! If I close my eyes, I can see and hear it all unfolding. LOL
ReplyDeleteI can see and hear it too!! LOL. :-)
DeleteYou've both probably been around for enough similar projects to have an advantage over some other readers. :)
DeleteThe struggle is real. Good job persevering.
ReplyDeleteJen, you are my king of quilter. I've had the same issues and responded possibly the same exact way! But we get'er done, anyway!
ReplyDeleteThank you for this very thorough and helpful tutorial. It makes me want to jump into some bias tape making right away. ;)
ReplyDeleteLol, this is the realistic bias tape tutorial, I'm sure! I was out and about today, bought the Wondertape to try on another project and completely forgot to buy a bias tape maker. They were right beside the tape and yet I still derped. Lol. I'll definitely be using this tutorial when I manage to get that blasted thing! Hahaha
ReplyDeleteToo funny. Happy you made it to the end. Congrats!
ReplyDeleteOMG!! Thank you so much for that!! I reallllly needed a deep belly laugh and golly this got me going!!! I've had a few ideas recently that would best be implemented with bias tape... maybe I'll have to get one of those little demons...er, bias tape makers.... LOL Or maybe I'll be TOTALLY lame and buy premade. Is that a sin? <3
ReplyDeleteWhat a fun tutorial! I will be sure to follow the steps exactly.
ReplyDeleteUs to step 5, this looks exactly like how I make all my quilt binding.
ReplyDeleteI do lament the fact that my lovely fabric ends up a weird shape. I have lots of large triangles in my stash - offcuts from binding.
I often wonder about my large hands. I blame my dad; I inherited his farmer's hands. :(
Sounds just like my experience using these bias tape makers.
ReplyDelete